Restricted/Critical data requires encryption of data at rest and in transit. The University of Iowa’s Zoom license does not cover protection of Personal Health Information (PHI) or data covered by the Health Insurance Portablity and Accountability Act (HIPAA), as is. However, by changing some settings in your UI Zoom client, you can use UI Zoom to securely discuss and record meetings containing PHI and HIPAA data. It is also acceptable to use these settings for restricted/critical data in social, behavioral and education research.
For additional guidance, see other educational tools:
Using Zoom to Conduct Virtual Research Visits
The version of Zoom available through the University of Iowa (UI) and UI Health Care (UIHC) is compliant with HIPAA standards as long as the research team follows the secure recording instructions in this IRB Educational Tool.
Follow the UI ITS recommendations listed below for IT safety, security, and best practices for the use of Zoom for research purposes:
- General information on the use of Zoom.
- Zoom Connection Issues
- Zoom Security and Privacy
Instructions for Changing Zoom Settings
Use the step-by-step instructions and images to change the Zoom settings for using Zoom with sensitive data.
1. Log in to your UI Zoom account. Go to https://uiowa.zoom.us/ and sign in with you HawkID and password.
2. Click “Settings” on the left side menu of the page, select ‘Meetings’ from the top menu header and scroll down to the ‘In Meeting (Basic) section.
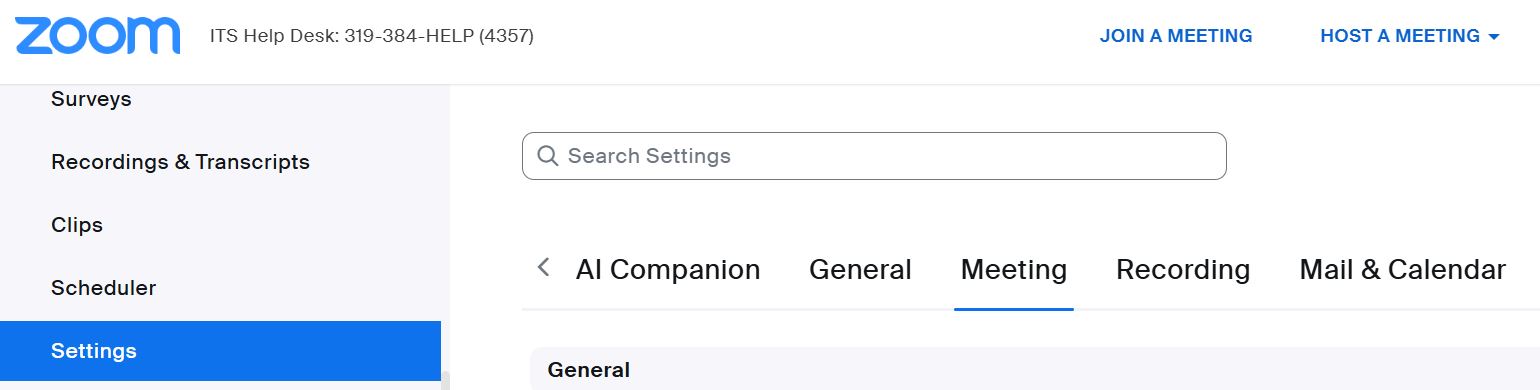
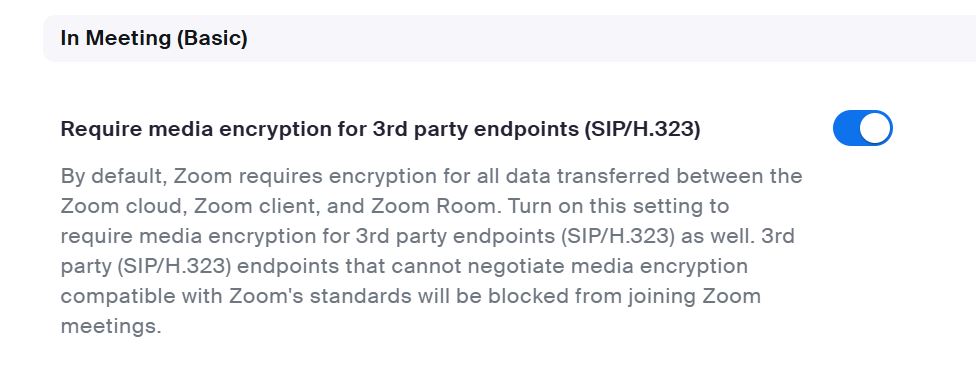
3. Enable “Require Encryption for 3rd Party Endpoints.”
4. Consider disabling chat (highly recommended, but not required).
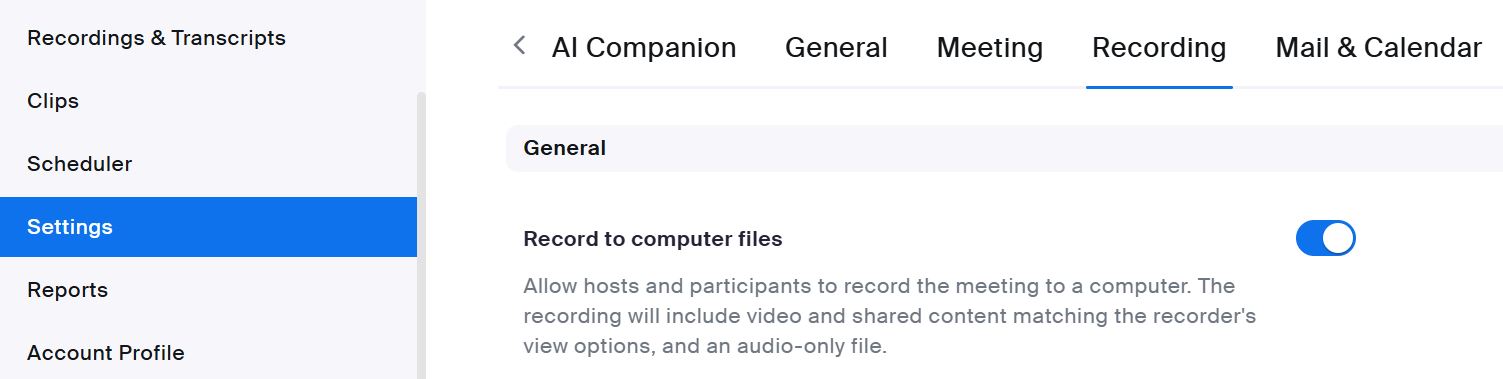
5. Under the ‘Settings’ menu on the left, click the ‘Recording’ tab from the menu header at the top of the screen.
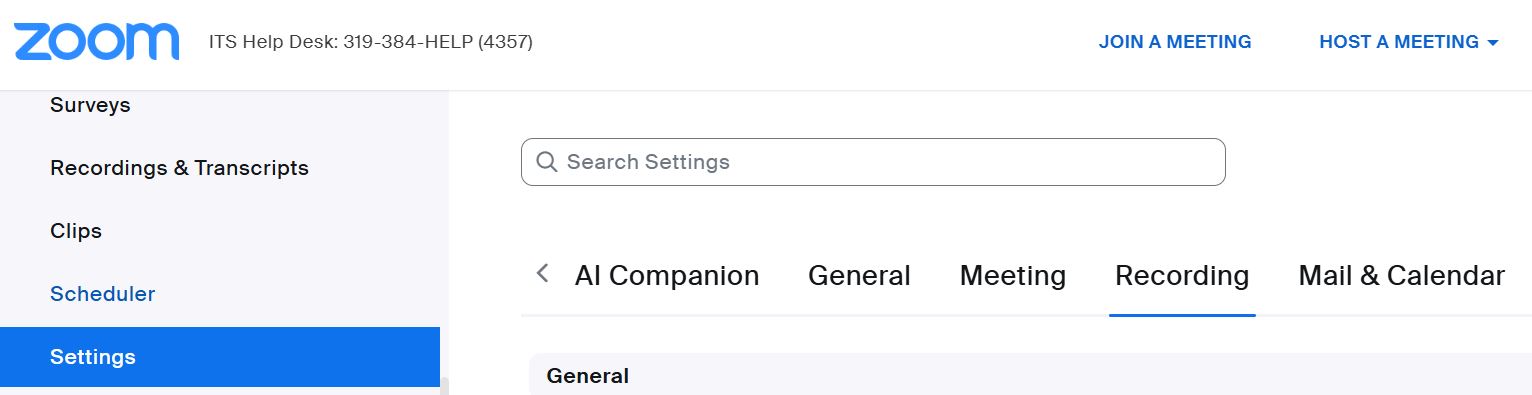
6. Under ‘Recording’, scroll down to the ‘General’ heading and enable the ‘Record to computer files’ option.
7. Make sure “Automatic Recording” option is disabled further down the page.

8. Ensure the ‘Require passcode to access shared cloud recordings’ toggle is selected.

9. Ensure that participants are notified that they will be recorded by selecting the ‘All participants’ options under the ‘Notification’ heading for ‘Recording notifications-Zoom clients’

10. Save your changes, if prompted, and then log out.
11. Now, launch the Zoom desktop client and sign in to your UI Zoom account. If you do not already have the client installed on your computer, this link will direct you to the appropriate Zoom webpage to download the client and includes instructions on how to properly sign in: https://its.uiowa.edu/services/zoom/how-sign-zoom.
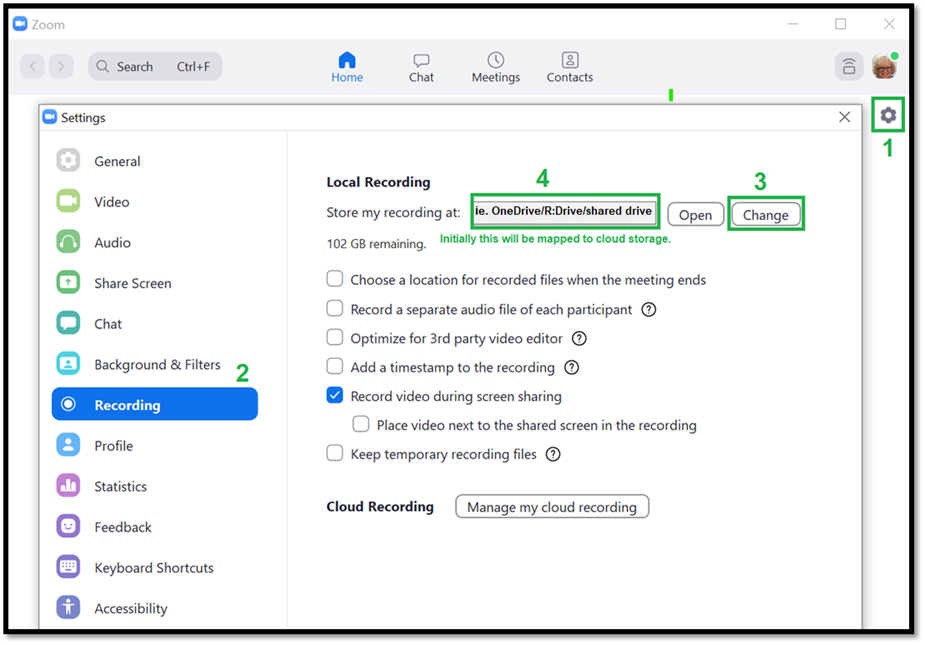
12. Once the UI Zoom client is launched, click on the “Settings” wheel underneath the search bar near the top right.

13. Click on “Recording” and choose the storage location of your local recordings.
- Do not use the Cloud Recording function for Restricted/Critical data.
- The storage location must be UI-managed and approved to store highly sensitive data like UI OneDrive, RDSS, H: drive (UI home drive), etc. This link lists what UI services are approved for different levels of data sensitivity: https://its.uiowa.edu/dataclassificationguide. See also Data Security Guidance.
- The storage drive must be mapped to your computer before you select a UI-managed storage location within the UI Zoom client,. If you have questions on how to map drives, please contact the ITS Help Desk, HCIS helpdesk or visit the ITS webpage for the storage service you are using.
14. You are now ready to securely record a meeting that may contain restricted/critical information.
For a printable version: Secure Zoom Meetings and Recording for Restricted and Critical Data
Version 2, 5/29/25